Knowledge
How to Add DNS Records
Learn how to set up DNS records for SelfMailKit
Before sending emails with SelfMailKit, you need to create a domain and add the DNS records to your registrar. This ensures good deliverability and authentication.
This is what it looks like when you create a domain:
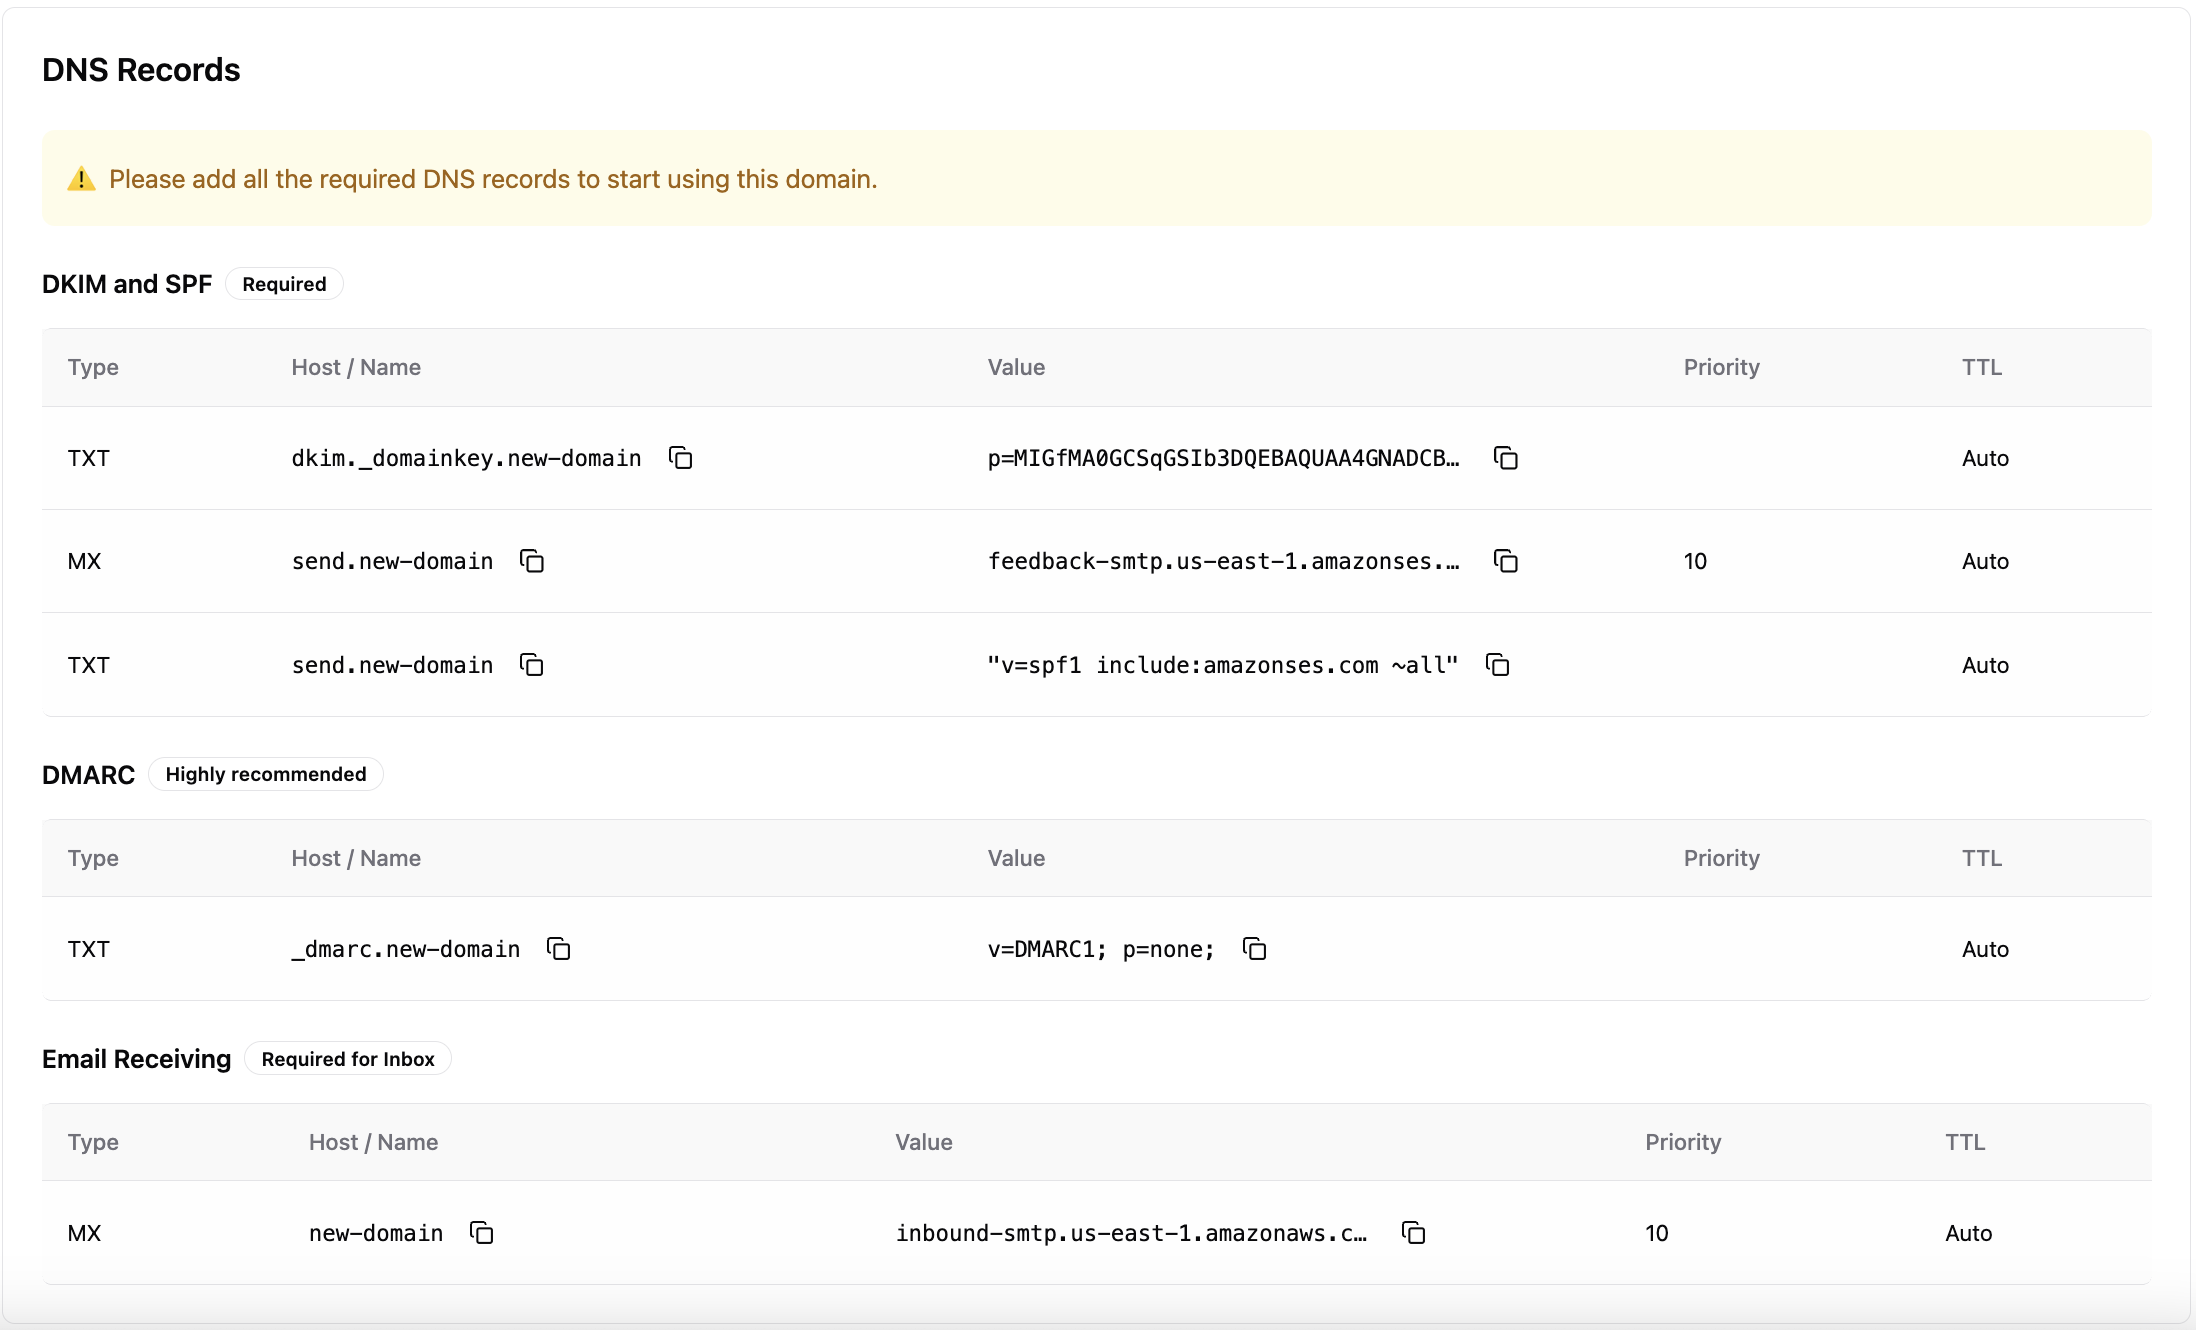 Let’s break down the records and learn how to add them to your registrar.
Let’s break down the records and learn how to add them to your registrar.
DKIM and SPF Records
These records are required for email authentication and deliverability.DMARC Record
Highly recommended for enhanced security and deliverability monitoring.Email Receiving
Required if you want to receive emails in the native built-in SelfMailKit Inbox. If you don’t need to receive emails, you can skip this record.| Type | Host / Name | Value | Priority | TTL |
|---|---|---|---|---|
| MX | your-domain.com | inbound-smtp.ses-region.amazonaws.com | 10 | Auto |
After adding these records, you need to wait for DNS propagation. Generally,
it takes a few minutes, but sometimes it can take up to 48 hours. Click the
Check Verification button in the SelfMailKit dashboard to see the status.Common Issues and Solutions
If records aren’t verifying:
- Check for typos in the Host/Name fields
- Ensure you’ve replaced with your actual domain
- Verify the record types (TXT vs MX)
- Wait for DNS propagation (up to 48 hours)
- Use DNS lookup tools to verify record publication
If you need help:
- Use the dashboard’s copy buttons to avoid typos
- Contact support if records aren’t verified after 48 hours or you need help with anything else
- Check your DNS provider’s specific documentation for custom requirements